Well Properties: Posting
Use the Posting page to display text information about a well along
side
the symbol. Once you create a well posting it will appear in the list. Turn postings on by placing a check mark in the first column. Click the check box
in the
Custom column to customize
the appearance, or remove any
customization from the posting.
-
Click the Quick Entry Wizard icon (
 ).
). -
Select the parameters in the Add Well posting dialog.
-
Click
 .
.
-
Highlight the posting.
-
Click the Edit properties icon (
 ).
). -
Change the parameters.
-
Click
.
Posting Parameters
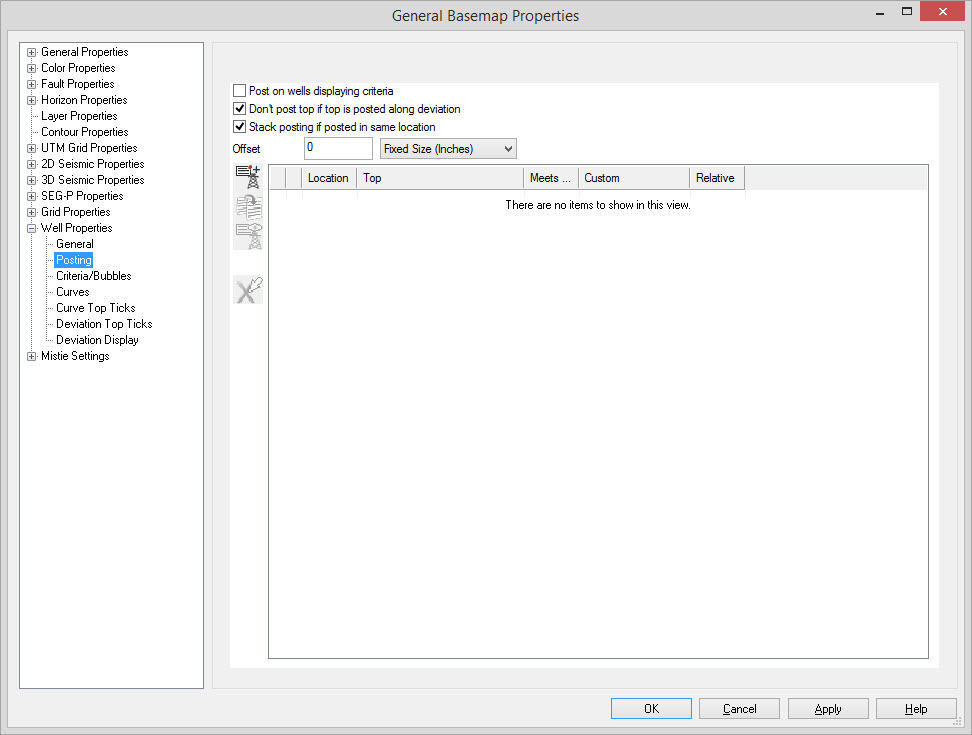
Don't post top if top is posted along deviation: When this is turned on, a top depth will not be posted if it has already been posted along the deviated well path. This can help reduce clutter on your map.
Stack posting if posted in same location: When this is turned on, multiple well postings in the same location will be placed so both are visible. When turned off, multiple postings in the same location will be drawn on top of each other. This may be preferred if you have a single top with multiple names in your project.
Offset: The distance from the well symbol that the posting will display in Fixed Size (Inches) or Variable Size (Meters).
Postings List
Quick Entry Wizard: Open the Well Posting dialog box to create a new well posting. Duplicate Selected Entry: Create a
copy of the currently
selected posting. Edit Properties: Open
theWell Posting dialog box to
change any of the parameters for the selected posting. You may also double
click on the item to edit it.
Duplicate Selected Entry: Create a
copy of the currently
selected posting. Edit Properties: Open
theWell Posting dialog box to
change any of the parameters for the selected posting. You may also double
click on the item to edit it.  Delete selected item:
Permanently delete the selected posting .
Delete selected item:
Permanently delete the selected posting . Note: To customize an entry, turn on "Custom Posting" to open the Custom Well Posting dialog box.
Add/Edit Well Posting
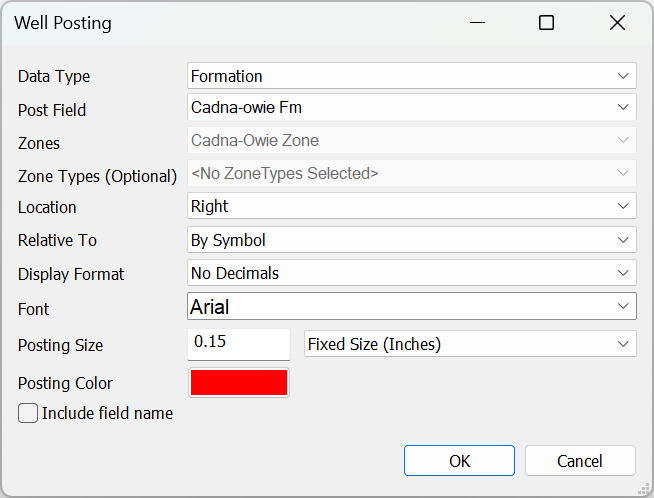
Data Type: Select the data type to post. Options are General Well Information, Formation, Production, Zone Attribute.
Post Field: Select the data to post. Note: Options in this drop down will change depending on the Data Type selected.
Zones (Optional): Limit your posting to a certain zone. Note: This is only used for zone attributes.
Zone Types (Optional): Limit your posting to a certain zone type. Note: This is only used for zone attributes.
Location: This specifies where to place the posting relative to the bottom hole location. Valid options are: Top left, top, top right, right, bottom right, bottom, bottom left, left, and center. Note: Center will over post the well symbol.
Relative To: This specifies if the posting should be placed by the symbol, always at the top hole location, bottom hole location or both. If using "By Symbol", set the symbol location on the General page. If a Zone Attribute Data Type is selected, an additional option of Along Well Zone is available, and will post the Zone Attribute at it's occurrence along the well bore.
Display Format: Used to specify the number of decimal places when posting numeric values.
Font, Posting Size, and Posting Color: These define how the posting will appear. Select the font, specify the size, and select a color.
Include field name: When turned on you will
see the name of the field posted next to the posted value.
Tops will appear as "TOP1: -101.5" on the map. If unchecked,
"-101.5" will be displayed on the map.
Also See
— MORE INFORMATION

|
Copyright © 2020 | SeisWare International Inc. | All rights reserved |